
Flow overview
An athlete can start registering for an event without having logged in beforehand. The platform opens a public view of the event, lets you select an active rate, and guides you through a multi-step form. If you don’t have an account, one is created automatically once registration is complete.1
Browse the catalog and open the event
From the home page select any event from the Upcoming Events list. See Search events.
2
Select an active rate
The modalities and rates appear at the bottom of the event page. Choose the rate that is currently active and click Select Rate.
3
Complete the registration information
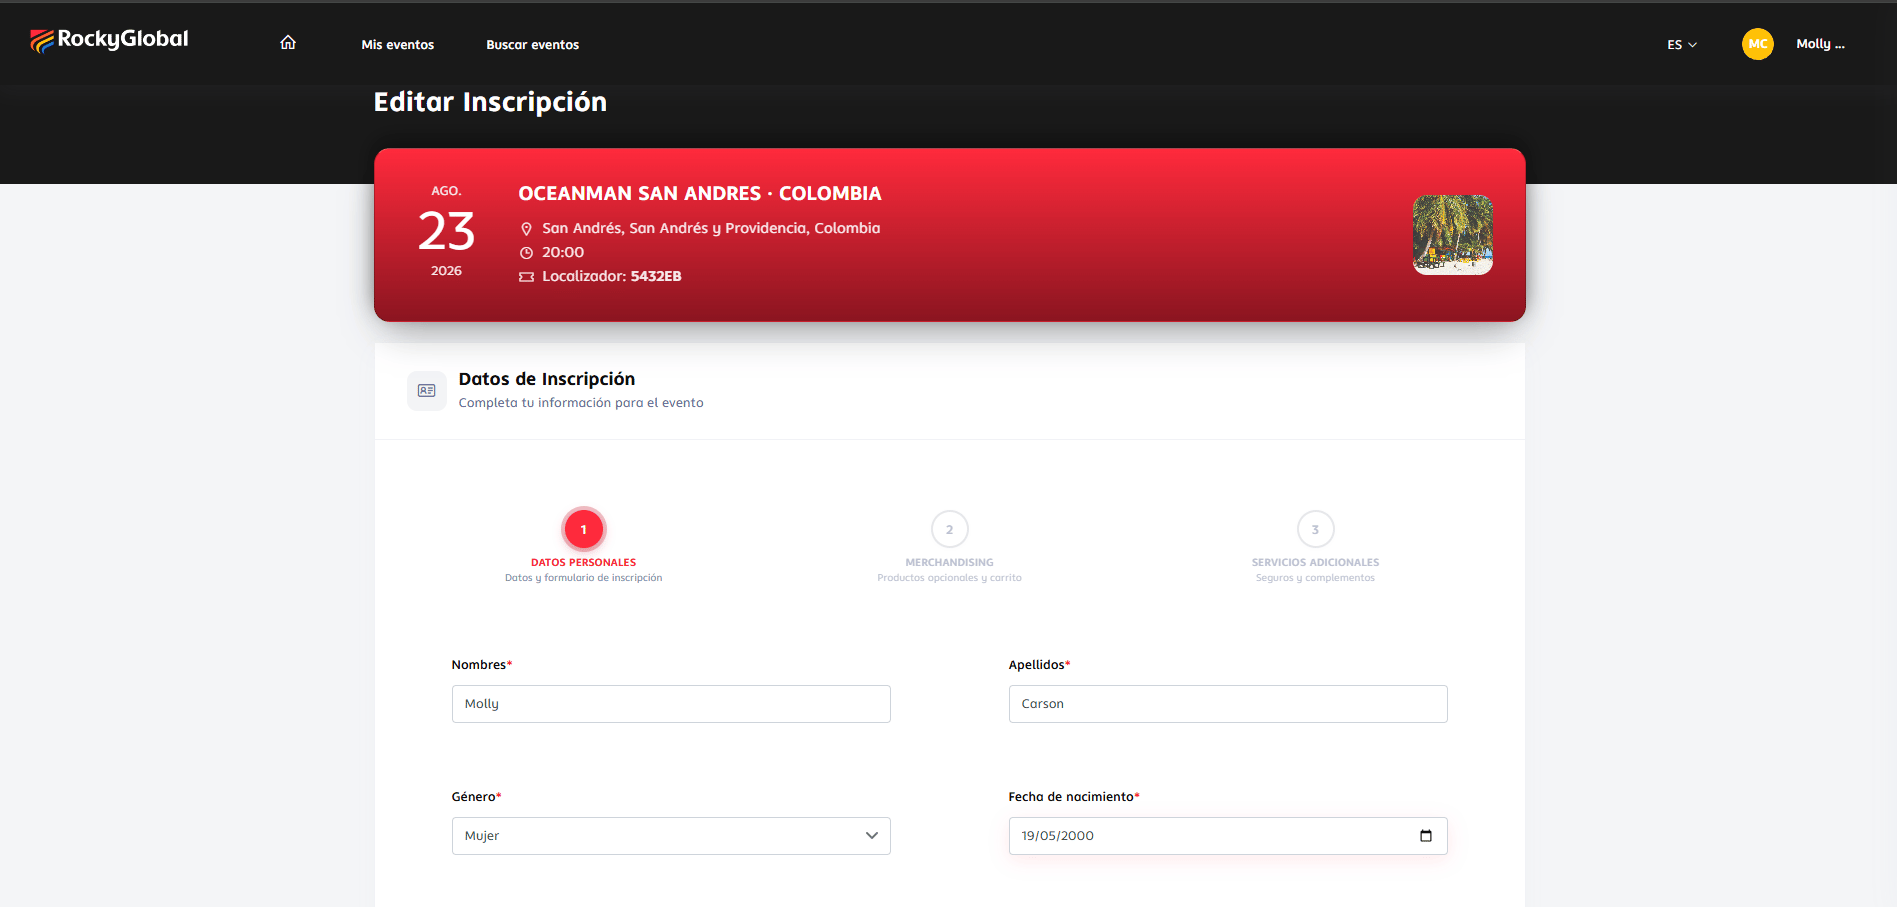
Fill in the form for step 1. Personal information with the required fields and any additional steps the organizer has configured.
4
Add merchandise (if applicable)
In step 2. Merchandise you can add optional products (for example official t-shirts) or continue without buying.
5
Additional services (if applicable)
In step 3. Additional services you can add insurance and add-ons offered by the organizer.
6
Finish registration and pay
Click Finish registration to go to the payment gateway. Once payment is completed, the registration is confirmed and you receive the receipt by email. See Payments and billing.
1. Rate selection
Each event defines one or more rates (for example OCEANMAN, HALF OCEANMAN, SPRINT, OCEANKIDS, OCEANTEAMS, HALF OCEANMAN 5KM & SPRINT 2 KM) and, within each one, a rate schedule with prices by date range.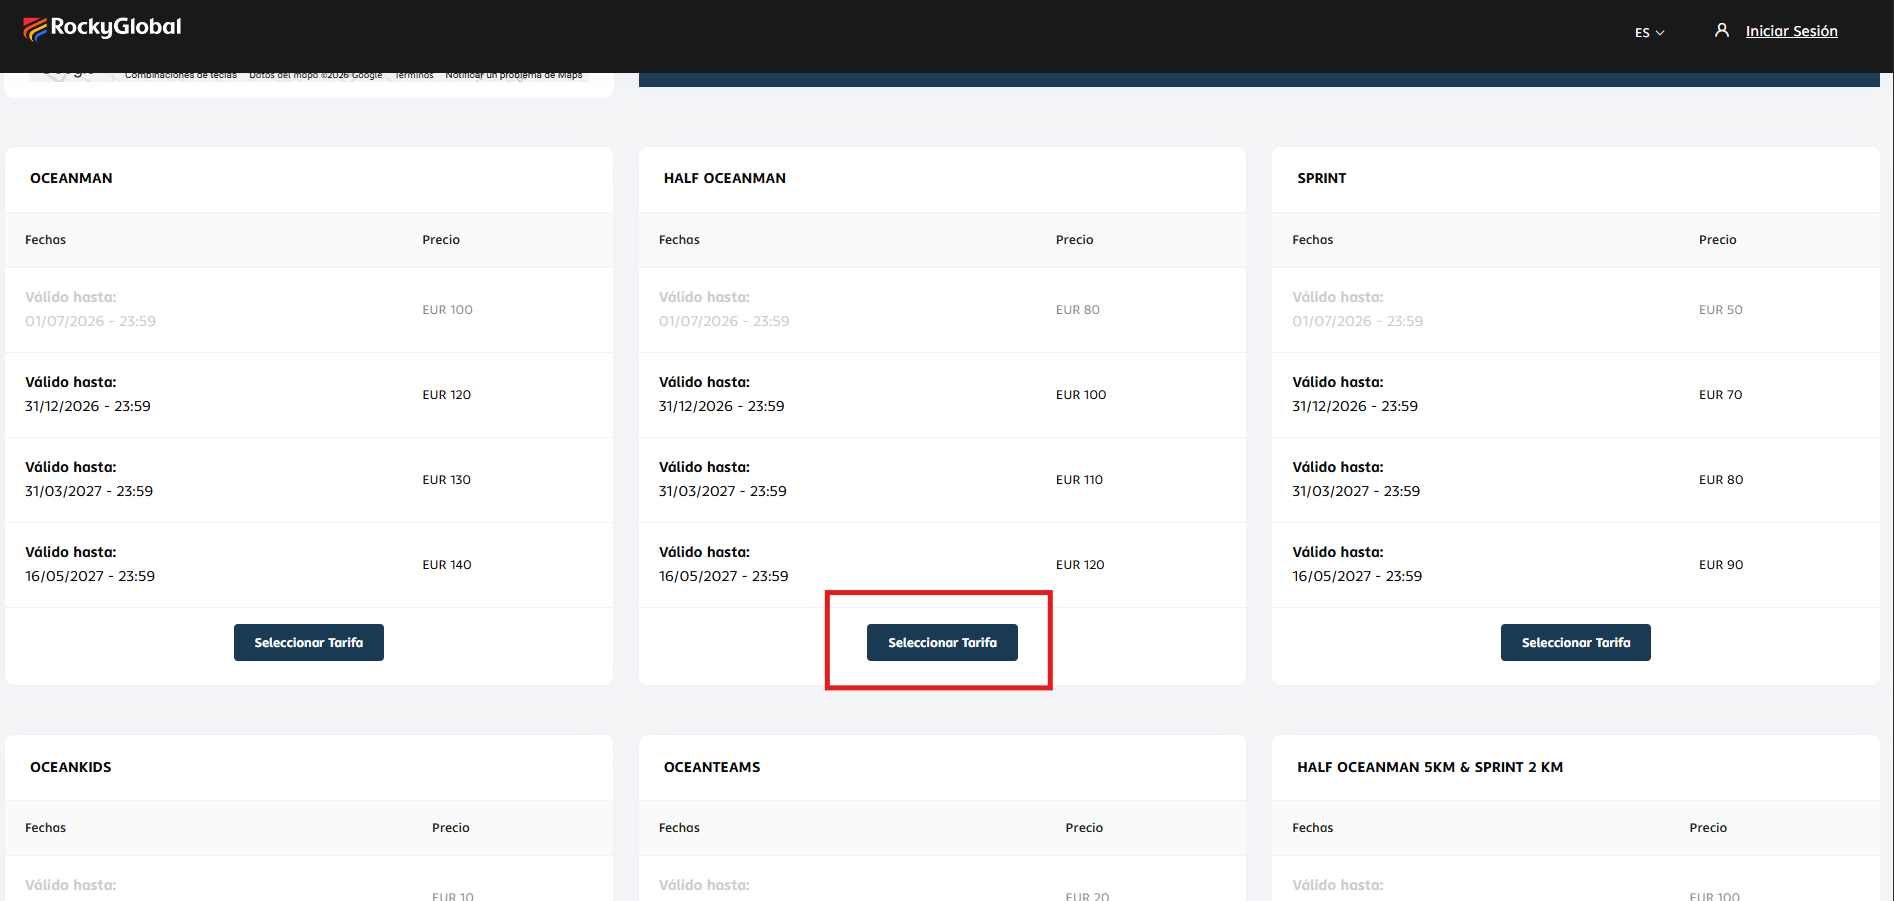
- Dates: the range during which the rate is active (Valid until: DD/MM/YYYY hh:mm).
- Price: amount in the event’s currency (for example EUR).
- Select Rate button: only appears enabled when within the registration dates; rate rows that have already expired are shown in gray and cannot be selected.
Active rate: this is the first row whose valid until date is in the future. Even though you can see earlier rates (already closed) and later ones (not yet active), you can only register using the rate that is active at the moment you click.
2. Personal information
Once you select a rate, you enter the registration wizard. The indicator at the top shows the steps configured for the event, for example: 1. Personal information, 2. Merchandise, 3. Additional services.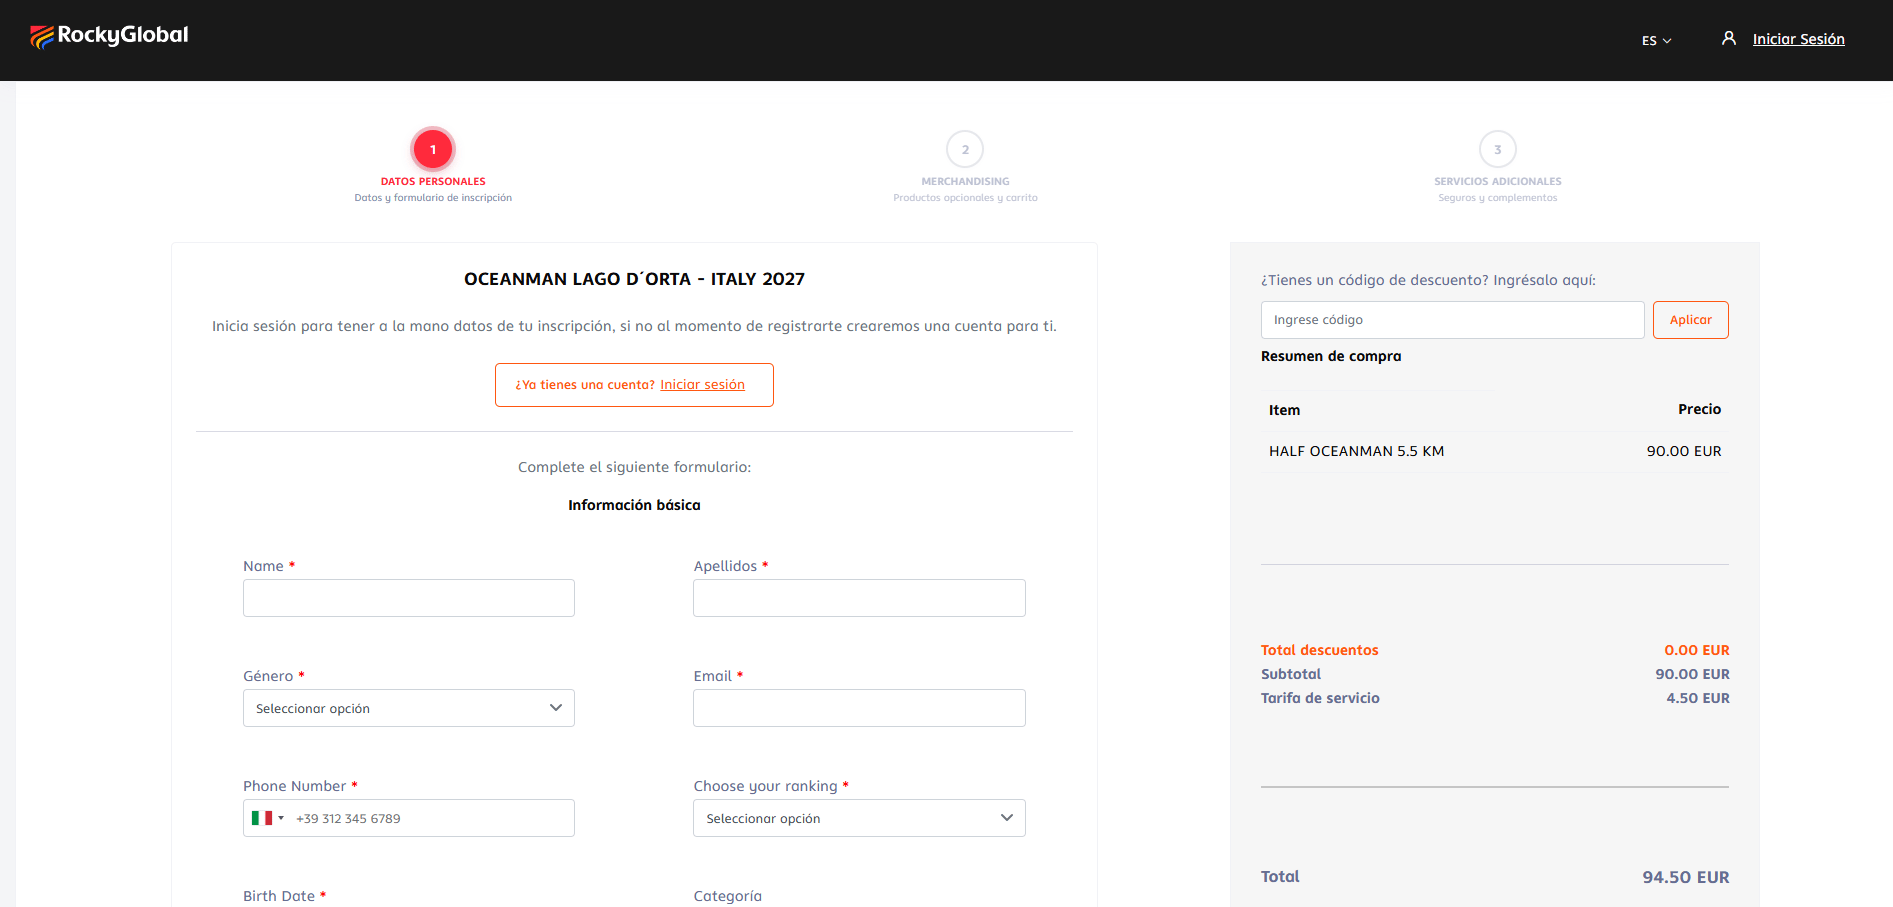
- Selected item (modality + distance).
- Total discounts, Subtotal, Service fee, and Total.
- Do you have a discount code? field to apply coupons before paying. See Discounts and codes.
Registration form
The form has a Basic information section common to all events and, optionally, additional sections configured by the organizer (team, emergency contact, medical information, sizes, etc.). Required fields (marked with*) in Basic information:
Automatic registration: if you register without an account, Rocky Global will create one for you at the end of the process using the email from the form. See Account registration.
Additional event steps
In addition to Basic information, the organizer can add custom steps and fields to the form (for example emergency contact, t-shirt size, club, federation number, acceptance of rules, etc.). These appear within the same step 1 and are required when the organizer marks them as such.3. Merchandise
In step 2 you can add optional products the organizer has published in the event store (t-shirts, kits, commemorative medals, etc.).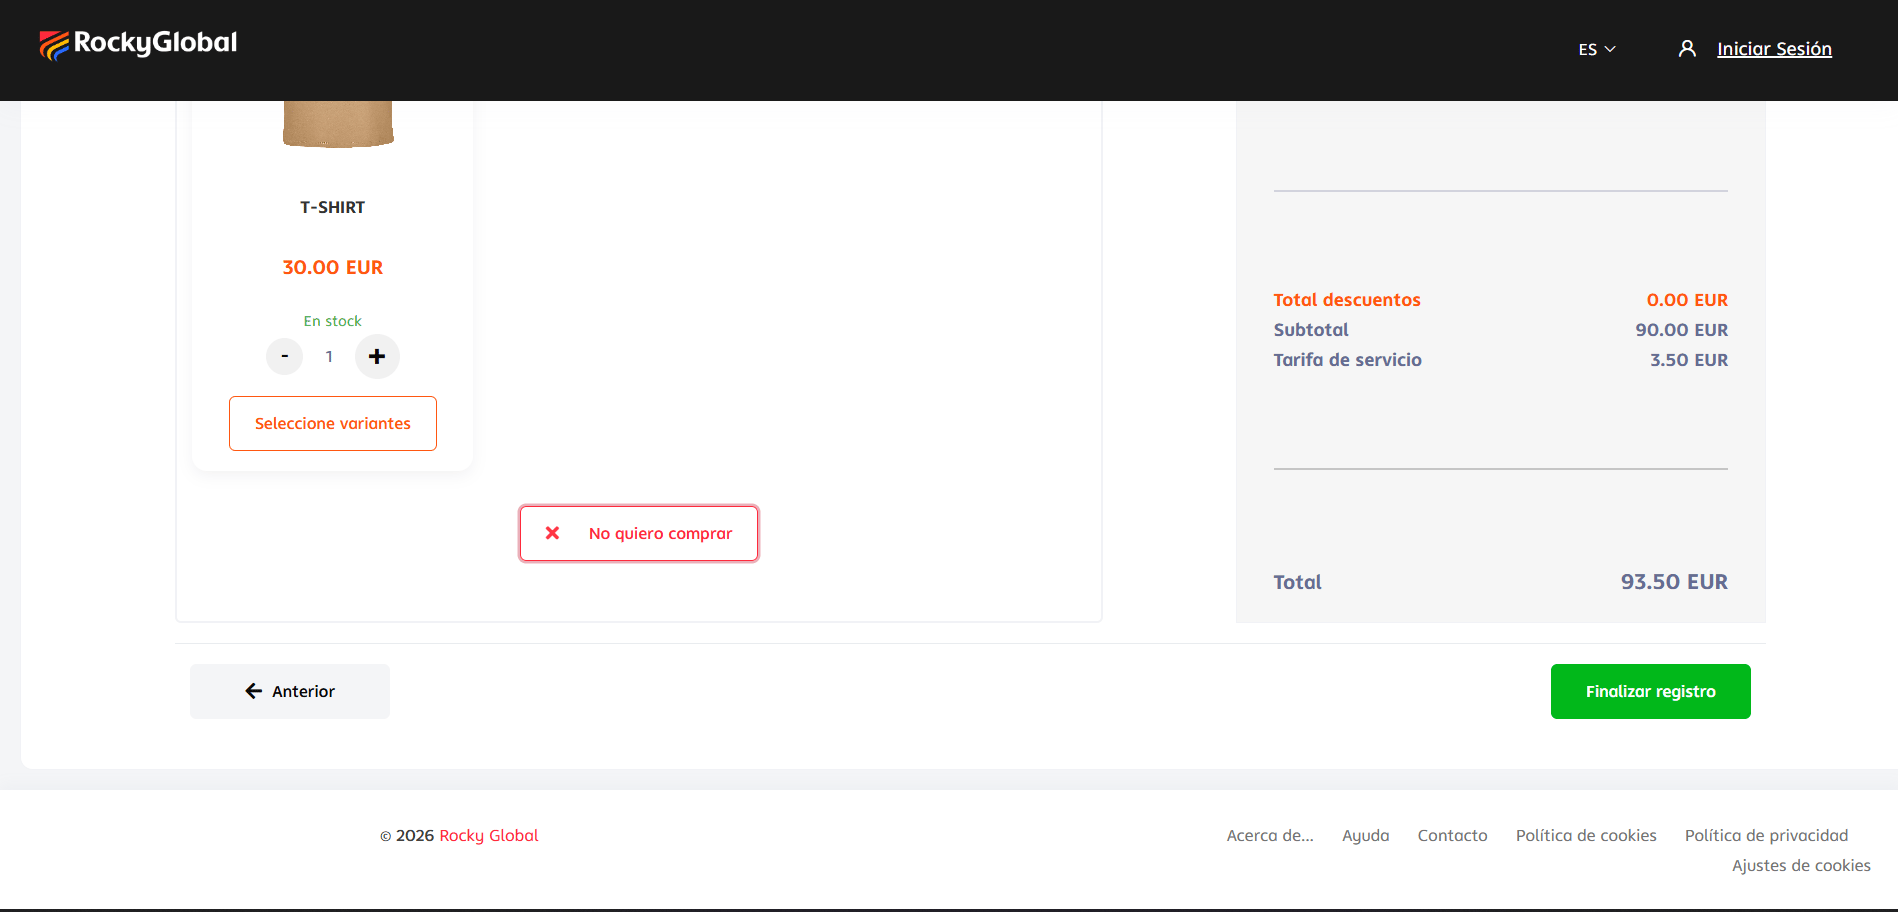
- View price, availability (In stock), and image.
- Adjust the quantity with the
-and+buttons. - Click Select variants if the product has size or color options.
- Click I don’t want to buy to skip that product and continue without it.
4. Additional services and payment
If the organizer offers insurance or add-ons (step 3), they are shown before the payment gateway. Upon confirming, you are redirected to the payment provider to complete the transaction.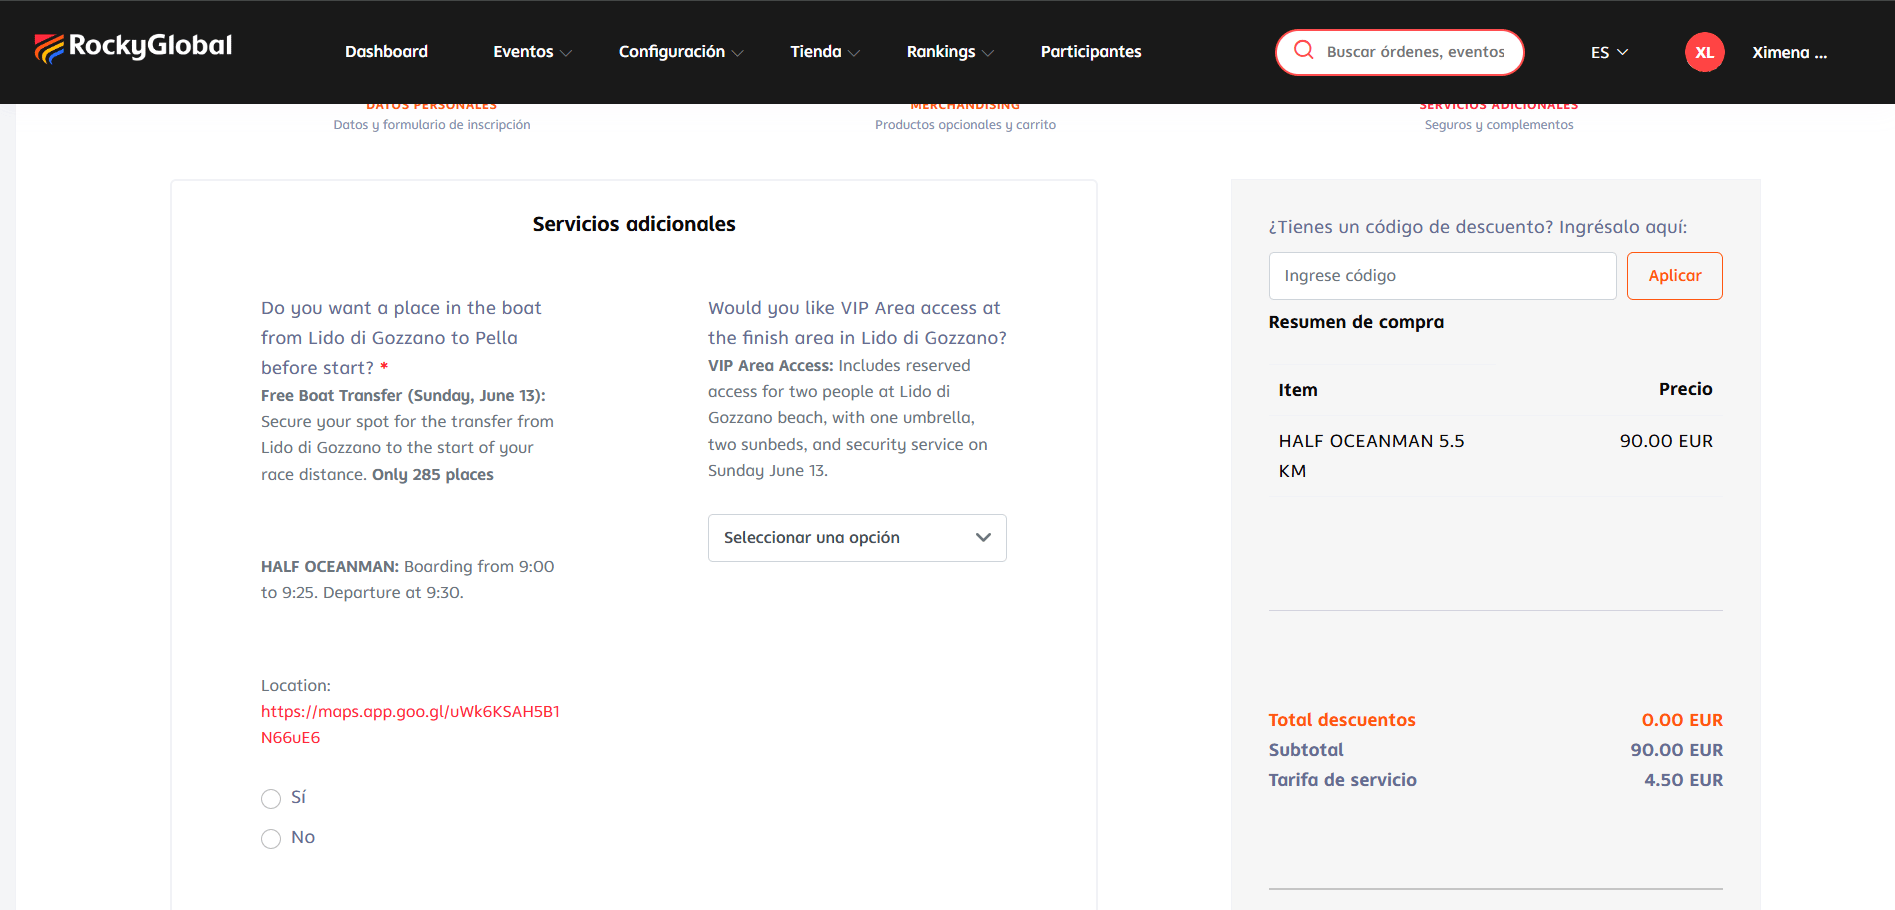
- You receive the receipt and registration number by email.
- The registration becomes visible in My Events.
- If you didn’t have an account, you’re also sent an email to set your password for the account that was created automatically.
Registration statuses
Changes to a registration
Depending on the organizer’s policies, you may be able to:- Change category (if space is still available).
- Update your size.
- Transfer the registration to another person.
Refunds are not requested directly on the platform: you must contact the organizer, who reviews and processes them according to their own policies. See Payments and billing.