
Step by step to create an event
1
Access the panel
Go to your organizer panel and click New event.
2
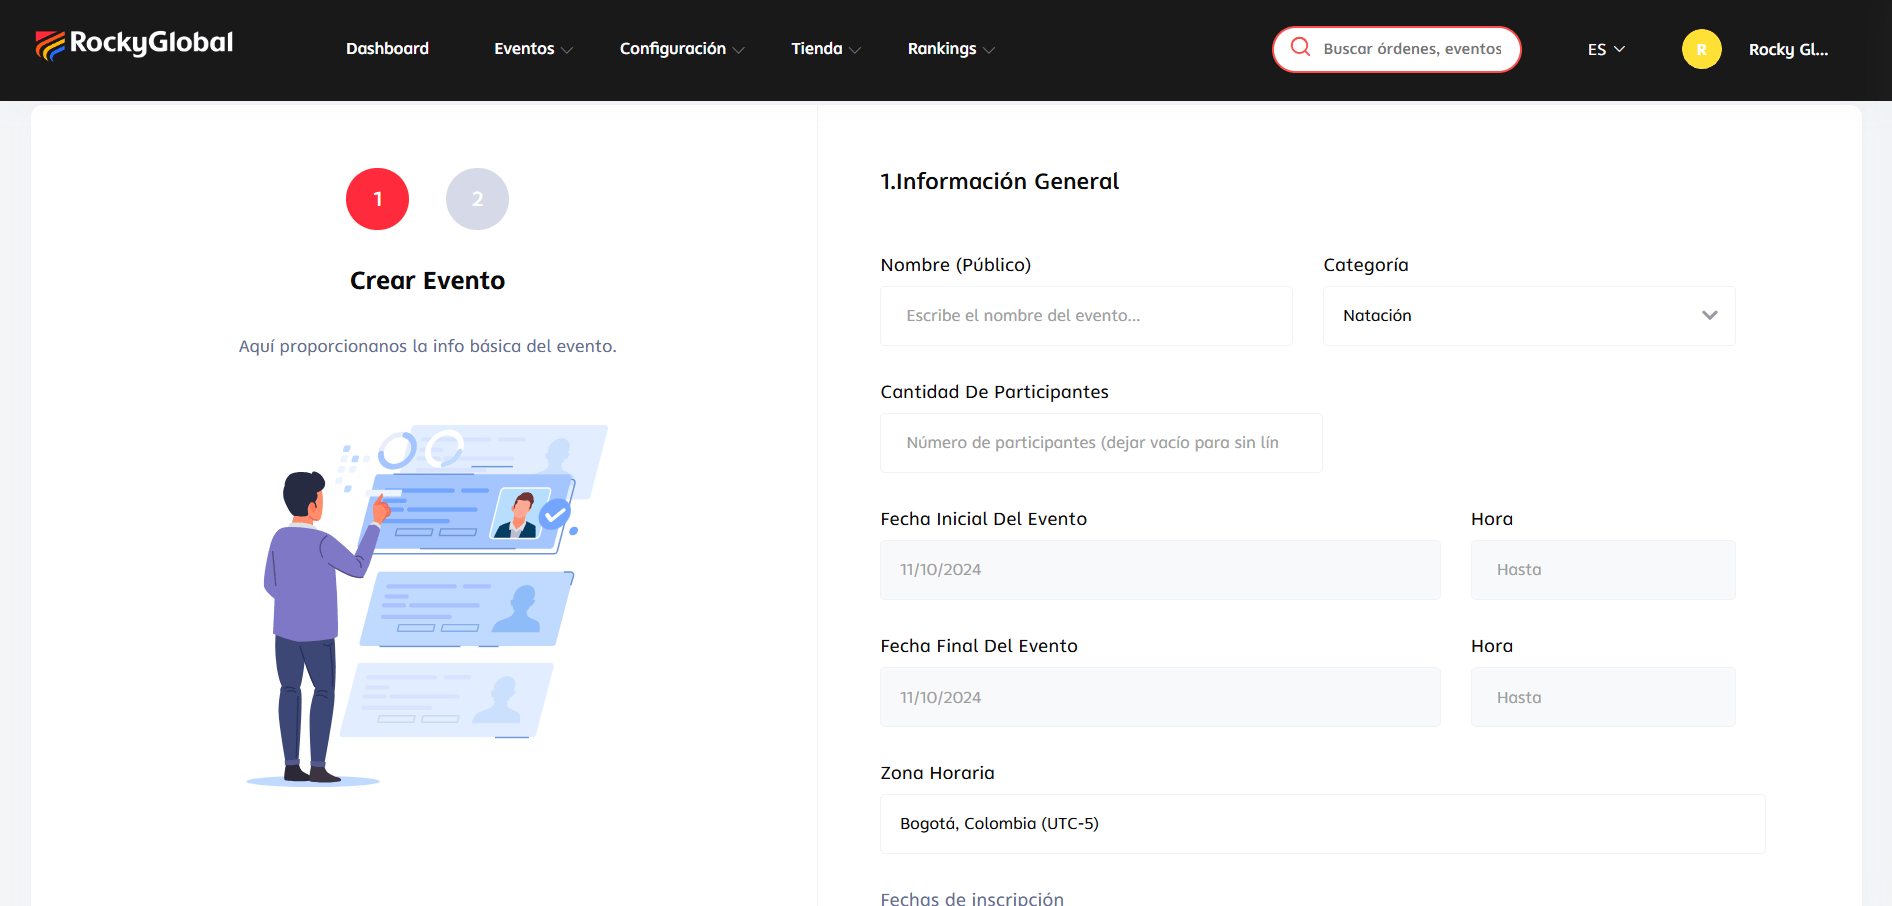
General information (step 1 of 2)
Fill in:
- Public event name.
- Category (sport).
- Number of participants (leave empty for no limit).
- Event start date and time.
- Event end date and time.
- Time zone.
-
Registration dates (open and close).
3
Complete the event's basic information
Once the event is created, go to Settings → Basic Information, General data tab: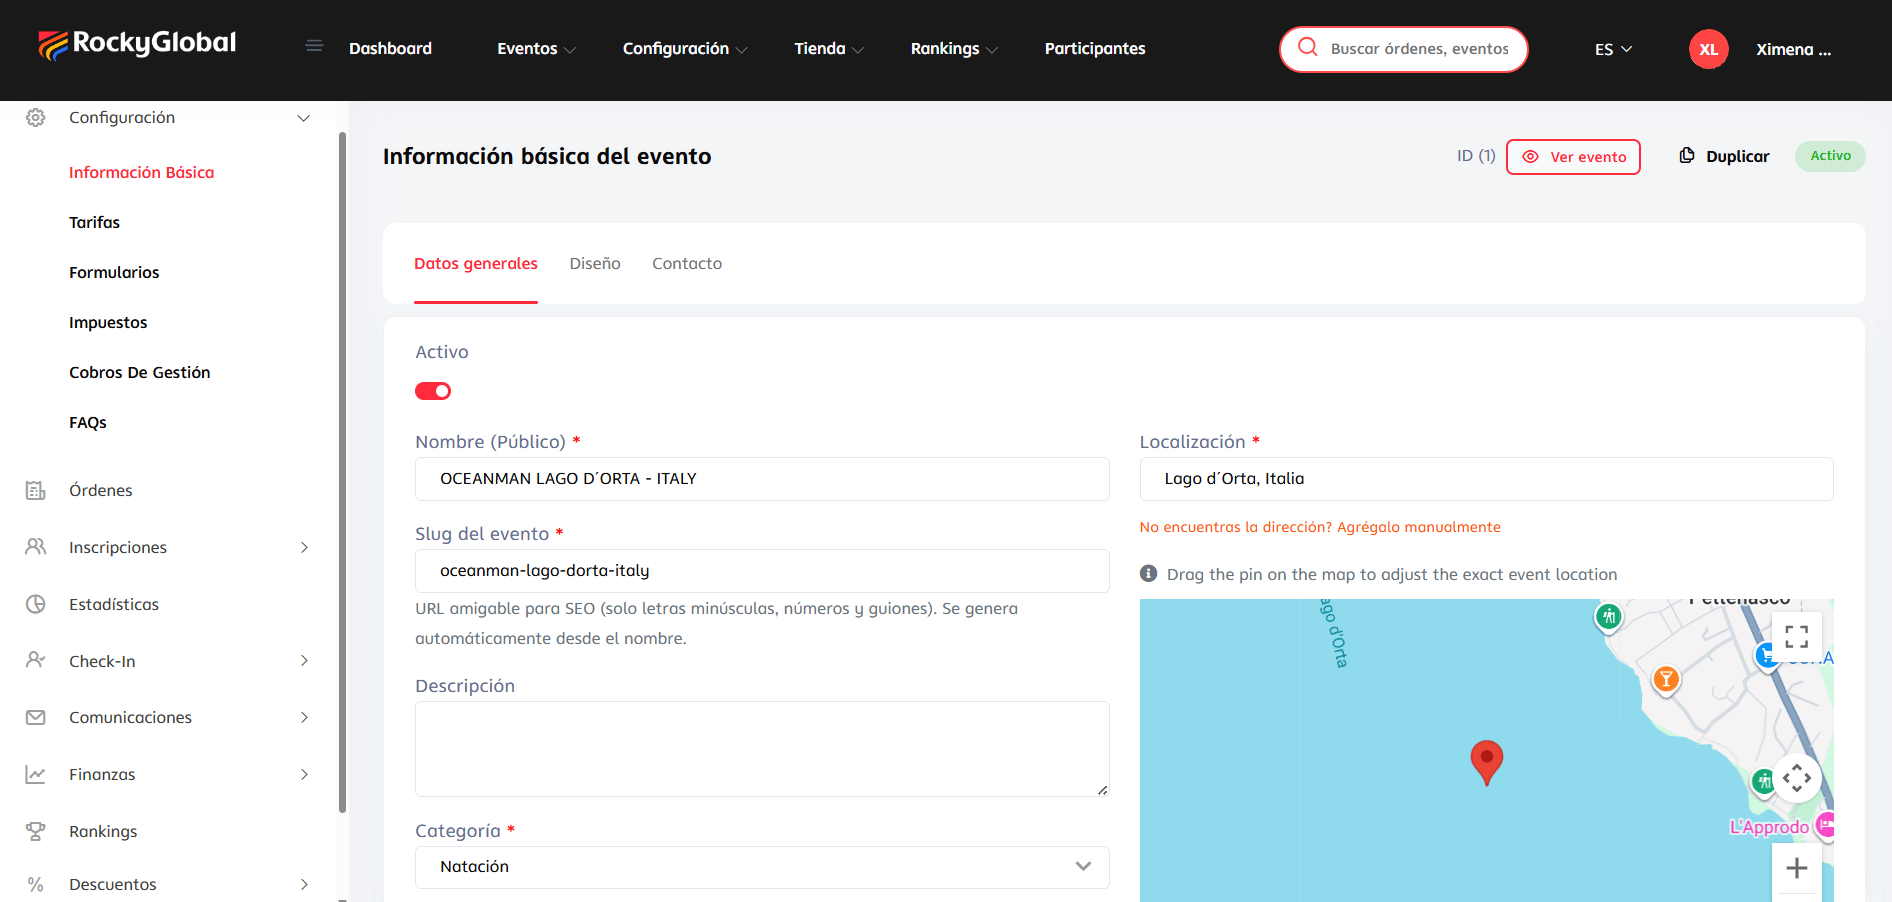
- Active toggle (activates/deactivates the event).
- Name (public).
- Event slug (friendly URL, generated automatically from the name).
- Description.
- Category.
- Location, with an interactive map where you can drag the pin to adjust the exact location, or add the address manually if it’s not found.
4
Configure fees and capacity
The actual maximum capacity is set per fee, not at the overall event level. See Categories and fees.
5
Activate the event
A new event is inactive by default. Activate it from the panel when it’s ready to receive registrations.